%20(1536%20x%20634%20piksel)VHMVM.png)
%20(1536%20x%20634%20piksel)VHMVM.png)
What Is Briar Wood? How to Read Briar Quality

Hello friends,
In this article, we'll talk about the wood and root known as briar—scientifically *Erica arborea*—which has been widely used in pipe making since 1850. We'll explore how to evaluate the quality of this briar and what criteria we actually use to define "quality."
What Is Briar Wood and What Is a Briar Pipe?
First of all, *Erica arborea* is a species of flowering plant belonging to the heath family (Ericaceae), commonly known as tree heath or generally referred to as the briar tree (colloquially called "rose root" in Turkish).

It is an evergreen, perennial, woody shrub or small tree native to the Mediterranean Basin, East Africa (Ethiopia, Kenya, Tanzania), and parts of Western Asia. It typically grows between 1 and 7.5 meters tall.
It features small, needle-like, dark green leaves and fragrant, bell-shaped white or pale pink flowers that bloom between March and July.

Pipe Material: Thanks to its exceptional hardness, high resistance to heat and burning, high density, and ability to absorb moisture, the plant's root burl is used in crafting the finest pipes in the world. This root burl is specifically referred to as Briar in pipe making.
Which Wood Makes the Best Pipe? The Introduction of Briar to Pipe Making

The root burl of *Erica arborea* began to be used in pipe making primarily from the mid-19th century onward.
Why Was It Preferred?
Compared to materials commonly used up to that point—such as porcelain, clay, or meerschaum—briar was more durable, lighter, and naturally able to absorb the moisture and oils in tobacco smoke. These qualities quickly made briar the dominant and preferred material for pipe making.
Consequently, coinciding with the birth of modern pipe making, *Erica arborea* (briar) came to be accepted as the standard material from the mid-19th century onward.
Fitting the Pipe to the Briar

First of all, the main thing to look for is understanding which part of the briar root the pipe was made from. Ideally, as seen in the image on the right, "plateau" sections are used. While sections 3 and 4 are areas that should not be used in pipe making at all, section 2 is frequently used in the production of lower-grade pipes.
When working with a plateau block, a pipe can be carved three-dimensionally in many different ways. Again, the ideal method is to cut the block so that the outer surface of the plateau section—the craggy outermost layer where the root fed—corresponds to the bottom of the pipe bowl. With such a cut, the rim, the bottom of the bowl, and the top and bottom of the shank are adorned with birdseye, while the sides are decorated with grain.
To learn more about pipe anatomy, you can check out our article titled "Pipe Anatomy and Pipe Shapes."

Apart from this, a pipe can be oriented within the root block in many different ways. What matters most is that it is symmetrical and free of any sand pits. Ideally, pipes where the outer plateau surface is positioned at the bottom of the bowl will have up to 15% greater moisture absorption capacity at the base of the chamber—since the root absorbed all its nutrients through this section while underground—which reduces the likelihood of gurgling.
As for pits, if they are merely a cosmetic flaw on the pipe's exterior and do not extend into the chamber, they pose no issue regarding the smoking experience; however, they remain undesirable in terms of briar quality.
How to Read Pipe Briar Quality
To easily evaluate briar quality, the pipe must be smooth or sandblasted—meaning it should not be rusticated (textured with a carving tool).

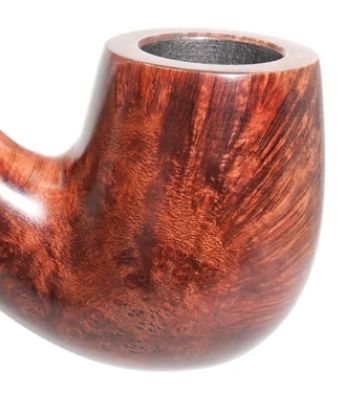
On a smooth pipe—one that hasn't undergone heavy surface texturing—the first thing that will draw your attention is the lines. These are called the "grain."
They can run vertically or horizontally, but they should ideally be uninterrupted, straight, and tight. If a sand pit appears where a line should run straight, this is a break in the grain, and we consider it a defect. While flawed briar blocks are mostly sandblasted or rusticated to produce second-grade pipes, high-grade briar can also be sandblasted or rusticated. On the other hand, we also see many pipes with minor pits left smooth without surface treatment, emphasizing the raw, natural state of the root.
To properly evaluate briar quality, we need to understand how the pipe was oriented within the root block, and the grain structure must be visible. One of the most important pieces of data when reading briar quality is the weight of the stummel alone (excluding the stem). This weight gives us insight into the density of the briar.
For an average-sized stummel with a bowl depth of 4 cm and a chamber diameter of 2 cm, the weight (excluding the stem) should ideally fall in the range of 30–35 grams up to 40–45 grams (±3 grams). This range indicates a balanced ratio between density and porosity. Lighter pipes may be more prone to overheating, while heavier pipes might tend to collect moisture and gurgle. This is only a likelihood, however—we cannot make an absolute rule like "lighter pipes always run hot, heavier pipes always gurgle."
When reading the briar quality of sandblasted pipes, we have a different advantage. Although the grain pattern itself is rarely distinct on sandblasted pipes, the sandblasting process highlights the growth rings of the wood.

On these pipes, the clearest indicator of superior quality is the growth rings known as "ring grain," which run continuously in a circular fashion around the bowl. Unlike standard grain patterns, these are layers that become distinct with each year of the root's growth. While standard grain lines are primarily nutrient pathways, each horizontal line on a sandblasted pipe represents a year of growth. These horizontal lines—which can be counted on sandblasted pipes as well as some smooth ones—represent the minimum time the briar spent underground. For example, the 9 to 13 countable growth rings on the Stanwell 2012 Pipe of the Year in the 6th image indicate that the root used for this pipe was "at least 9–13 years old."
At this point, it is worth noting that this interpretation is somewhat nuanced and not universally verifiable. Another perspective holds that these lines are not exact age rings, but rather indicators of the root's general age and maturity. To quote an analogy from dear Fatih Öden: "You can't know a person's exact age from the wrinkles on their face, but you know they are old." Both viewpoints ultimately agree that these lines offer insight into the maturity of the briar used, and that when they are tight, even, and uninterrupted, they signal high briar quality.
Another step we can take to evaluate briar quality—provided the inside of the chamber is not coated with a carbon layer—is to observe how the wood looks inside the bowl. Having distinct vertical grain visible inside the chamber is another sign of superior quality. It isn't common, nor is it explicitly required even for high-grade pipes, but it is still worth checking.

When we cut a root horizontally, we get a cross-section roughly like the one shown on the left. The section I refer to as the coarse region is cheap, used for the majority of pipes, and frequently utilized by commercial brands, whereas the plateau region is typically reserved for artisan and high-end pipes.
Although the core lump is unsuitable for pipe making and shouldn't be used, we still see lower-tier pipes incorporating this section into the bottom of the bowl or other parts, crafted using a combination of ebauchon and core lump.
If you look at a pipe and notice that the bottom of the bowl, a cheek, or a section breaks away from the grain, appears partially featureless, and contains no birdseye or grain, you can safely assume it was made from a portion of the plateau, but mostly from the coarse section. If you see no grain at all and it is completely featureless—containing neither birdseye nor grain—there is no problem in assuming it was crafted from the core lump + ebauchon region, without using any of the plateau section.
However, failing to keep your thoughts to yourself and sharing them with sellers might cause a bit of trouble :)
To sum up, when evaluating pipe briar quality, you can follow a checklist like this:
* How was the pipe oriented in the block? Is it proper and symmetrical?
* What is the grain density like? Is it tight or widely spaced, and are there any grain breaks or pits?
* Is the weight of the stummel (excluding the stem) balanced relative to its size?
* Are the growth rings distinct?
* Is the grain visible inside the chamber?
* If sandblasted, do the growth rings run continuously around the bowl? How is the quality of the sandblasting craftsmanship?
Pipe Briar Quality and Sandblasted Pipes
Evaluating the craftsmanship of sandblasted pipes requires a different perspective. The main reason sandblasted pipes are so popular is that they offer a three-dimensional, deep appearance while still keeping visible the details that allow us to assess briar quality.
When evaluating briar quality on sandblasted pipes, while the grain lines may still be visible under lighter sandblasting, they are mostly lost. Instead, we first look at the regularity of the growth rings—whether they run continuously all the way around—and check if the softer, recessed sections maintain a uniform depth across the pipe. While shallow sand pits disappear during sandblasting, deeper, unwanted pits cannot be camouflaged even with sandblasting; thus, sand pits visible on sandblasted pipes are usually the most undesirable ones.
Deep Sandblast: High-quality sandblasting deeply carves out the softer wood, leaving the denser, harder rings prominently three-dimensional and textured on the surface. This depth allows the pipe to look continuously different as light hits it from various angles.
Shallow and Flat Appearance: Low-quality or rushed sandblasting is shallow. It fails to adequately reveal the wood's ring structure, resulting in a surface that feels more like simple roughness or dullness.
Crisp and Defined Lines: A good sandblast ensures that the patterns are defined sharply and clearly.
Consistent Texture: The sandblasted texture should maintain a uniform depth and density across the entire surface of the pipe (from the rim down toward the shank).
Transition Areas: Where the sandblasting starts or ends (such as the bowl rim or the shank-to-stem junction), there should be no abrupt depth changes or smooth patches; transitions should look soft and natural.
Clean Rim: Sandblasting should leave the rim of the bowl and the interior of the chamber smooth and clean. Sandblasting must not ruin the inside of the tobacco chamber.
Sensitive Areas: The edges of the shank opening (where the stem fits) and where the draft hole enters should not be eroded or distorted by sandblasting.
Aside from these points, when reading briar quality on sandblasted pipes, we generally look for the same overall criteria mentioned above.
Pipe Briar Quality & Its Effects on Smoking - Prices and Notes
All the information above not only helps us evaluate a pipe's briar quality, but it is also essential for assessing its price. Still, pipes made from top-tier briar that are surprisingly affordable can often be found. Exceptional briar quality doesn't always mean a hefty price tag, and expensive pipes—more often than not—fail to meet the criteria above!
For a pipe with solid engineering, briar quality actually affects the smoke far less than you might think. Sure, if the outer plateau is positioned at the base of the bowl, its moisture absorption capacity is arguably a notch higher—but poor craftsmanship can easily ruin all of that. To learn how to evaluate pipe engineering, feel free to check out our article titled "How to Choose a Pipe."
When it comes to the two most critical issues—overheating and gurgling—the single most important detail to watch for is whether the stummel weight (sans stem) is properly balanced against its overall size. Beyond this, most other factors don't directly impact the smoke or cause noticeable changes, making them nearly impossible for anyone without years of experience to notice.
The real reason we care about briar quality comes down to three things: rarity, a shorter break-in period, and requiring less time to deliver an optimal smoke compared to lower-grade wood. While a pipe with premium briar and flawless craftsmanship can be broken in within a few months, one with solid engineering but average briar quality may require far more time. High-grade briar releases absorbed moisture much faster, whereas average briar demands longer resting periods between smokes. Thanks to its higher absorption capacity, top-shelf briar can comfortably handle two, three, or even four consecutive bowls, whereas an average block might become completely saturated by the second bowl.
On top of all this, between two pipes built with equal craftsmanship, differences in briar grade don't yield dramatic changes in flavor or smoke quality—in fact, they are practically imperceptible. Mind you, everything I've said here applies exclusively to pipes that don't incorporate the core lump section.
That’s pretty much all there is to say about briar quality. If you have anything to add or correct, let’s talk in the comments!
Hakan Badik



Comments